In this post I show how to tie the bowline knot with words, images and on video. We use the bowline knot to form a loop at the end of a line that does not contract. This is needed for example to fix a line at a mooring post or to attach the halyard on the head of a sail.
You can embed this video on your website and please don’t forget to share the video! Thank you very much!
← Square knot | ← Overview knots → | Cleat knot →
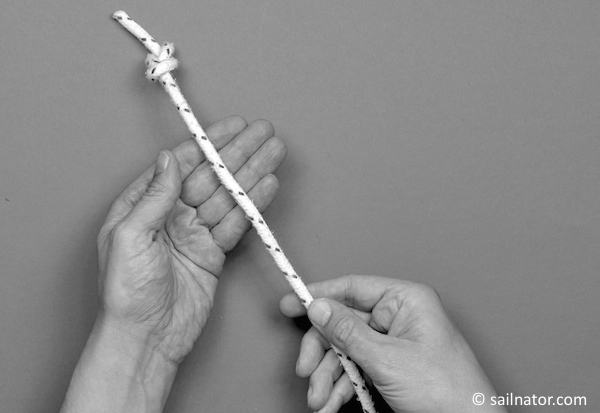
Follow these steps for tying the square knot: . Before I start it is useful to recognise which is the loose part and which the moored part of my line. Which end of my line would be attached somewhere in reality? For example at a cleat on my boat. So I tie a figure-eight knot in the end of my line to mark the moored part.
I place the figure-eight knot away from me over my left hand.
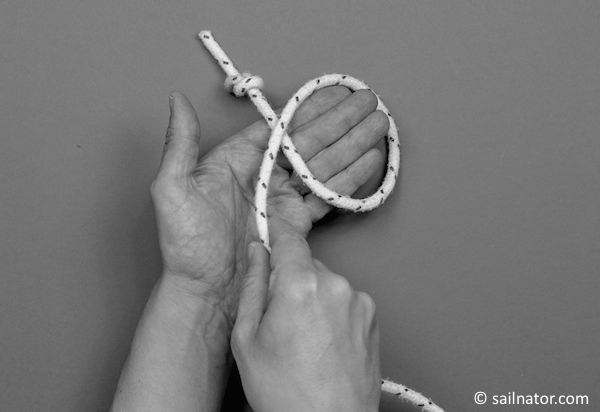
I take the loose part with my right hand and lay a loop where the loose part lies over the moored part of the line.
 The knot-lessons have also been published as ebook and paperback. For more information click here!
You can download the Ebook for example at:
iTunes UK & iTunes US | iBooks for iPad and Mac
Amazon.com & Amazon.co.uk | Kindle-Edition
Google Play | for Android
The paperback is available at: Amazon.com | Amazon.co.uk
I take the point where the two parts cross between my thumb and my middle finger of my left hand. With my forefinger I keep the moored part at a distance. I take the loose part with the right hand now and stick it into the loop from underneath.
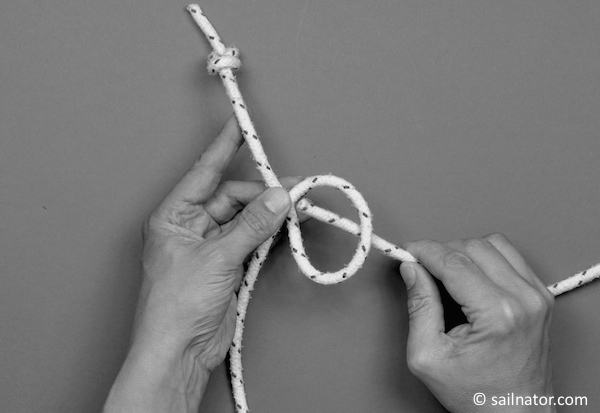
I pull the loose part a little bit. (But not too much. Otherwise we do not have a loop anymore afterwards.)
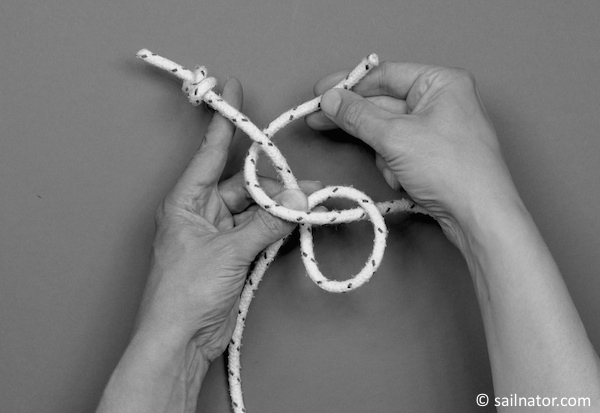
Now I stick the loose part into the loop again, but this time from above.
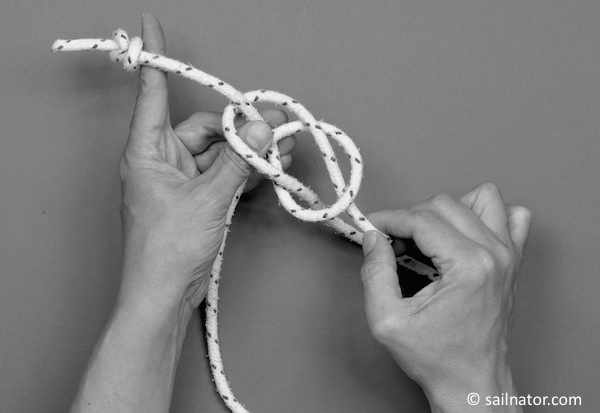
Now it is important to hold the moored part with the left hand and to pull with the right hand both bits of the loose part.
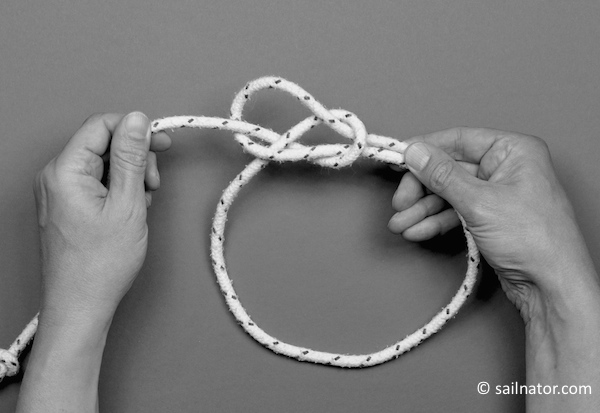
Now the bowline knot is finished.

Why is it important to put the loose part clockwise around the backside of the moored part? If we do it counter clockwise and stick the loose part into the loop again the tail will be inside the loop afterwards. If we put the loop over a mooring post the tail will always push against the post when the boat goes up and down in the swell. The knot opens itself this way. But if the tail is inside the loop we can better stick it through a ring if necessary. I show the bowline knot once again. There is a memory rhyme for this knot too: Here I have a pond, out of the pond comes a (water-)snake, at the banks of the pond it goes clockwise around a tree and dives back into the pond on the other side. (If you do not like snakes you can let out a rabbit out of its hole that runs clockwise around a tree back into its hole again.)
Now we pull the moored part and both bits of the loose part and the bowline knot is finished. Practice the bowline knot till you are able to tie it with closed eyes or behind your back.
All knots: Figure-eight knot | Square knot | Bowline knot | Cleat knot | Clove hitch | Clove hitch (laid) | Clove hitch (thrown) | Sheet bend | Double-sheet-bend | Round turn and two half hitches | Rolling hitch | Cleat with bowline knot