In this post I show how to tie the cleat knot with words, images and on video. We use it to attach a line to a horn cleat.
You can embed this video on your website and please don’t forget to share the video! Thank you very much!
← Bowline knot | ← Overview knots → | Clove hitch →
Follow these steps for tying the cleat knot: Before I start I again tie a figure-eight knot in one end of the line. It shall represent my boat that I want to cleat on the jetty. I take the line in my right hand and put it around the base of the horn cleat.
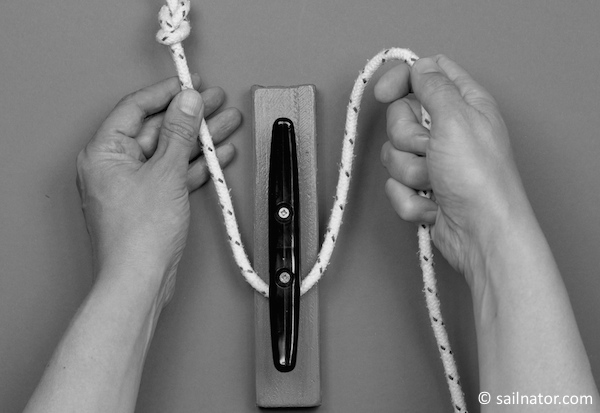
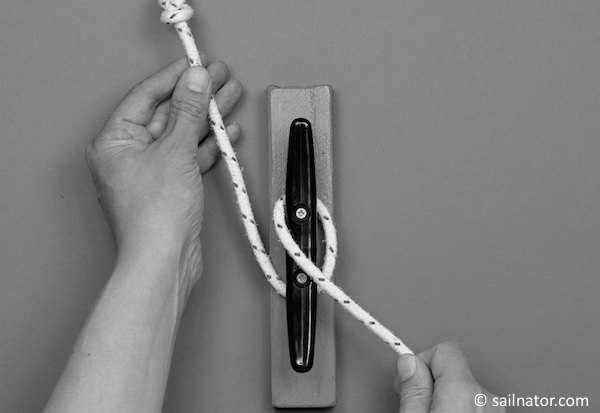
When I am back on the side where I started I lift the line and cross the cleat from the left to the right.
 The knot-lessons have also been published as ebook and paperback. For more information click here!
You can download the Ebook for example at:
iTunes UK & iTunes US | iBooks for iPad and Mac
Amazon.com & Amazon.co.uk | Kindle-Edition
Google Play | for Android
The paperback is available at: Amazon.com | Amazon.co.uk
Then I pull the line through under the part of the cleat that is facing me.
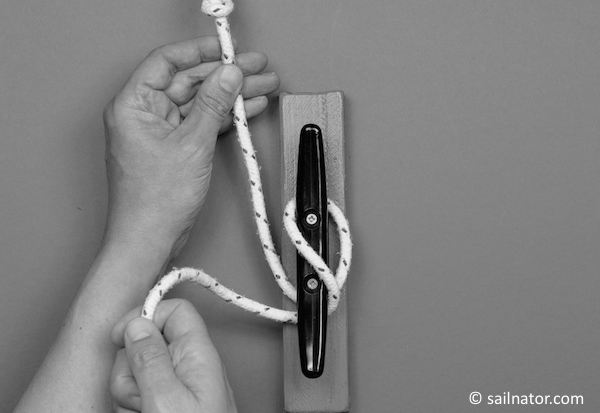
I cross the cleat and the line to the other direction and here comes the trick:
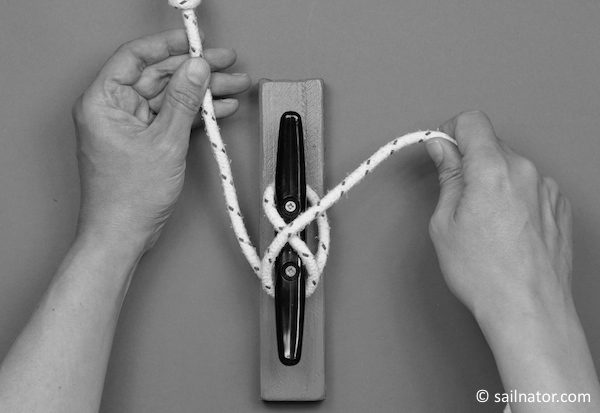
Instead of again pulling trough the line under the cleat I tie a loop which is called a bitter. For that I take the tail between thumb and forefinger of the right hand and turn the line the way a loop appears where the loose part is under the moored part.
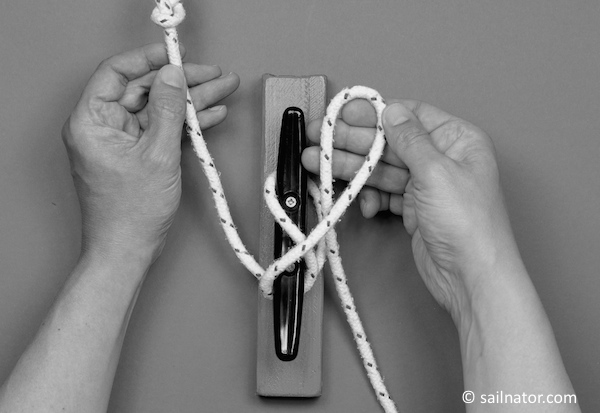
I put this loop over the part of the cleat that is away from me. The cleat knot is finished.
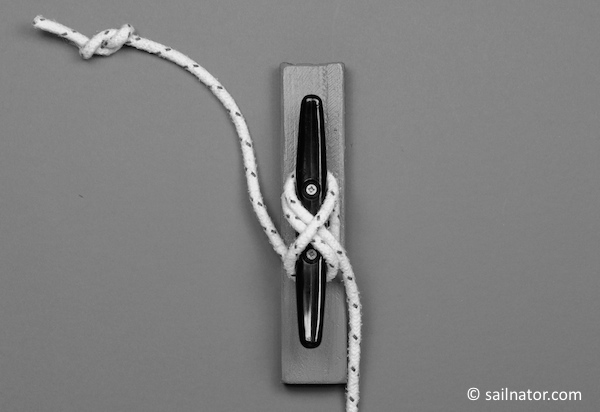
I memorize the progress like this: First I lay an O around the base of the cleat, than an X over it and then another X and then the bitter, a loop where the loose part is under the moored part. Then I put the bitter over the cleat.
O – X – X – Bitter.
Practice the cleat knot till you are able to tie it with closed eyes.
All knots: Figure-eight knot | Square knot | Bowline knot | Cleat knot | Clove hitch | Clove hitch (laid) | Clove hitch (thrown) | Sheet bend | Double-sheet-bend | Round turn and two half hitches | Rolling hitch | Cleat with bowline knot