In this post I show how to tie the square knot with words, images and on video. We can attach two lines of the same strength with it.
You can embed this video on your website and please don’t forget to share the video! Thank you very much!
← Figure-eight knot | ← Overview knots → | Bowline knot →
Follow these steps for tying the square knot: I start in the same way as I would when tying a ribbon. I take both ends of the lines one above the other, …
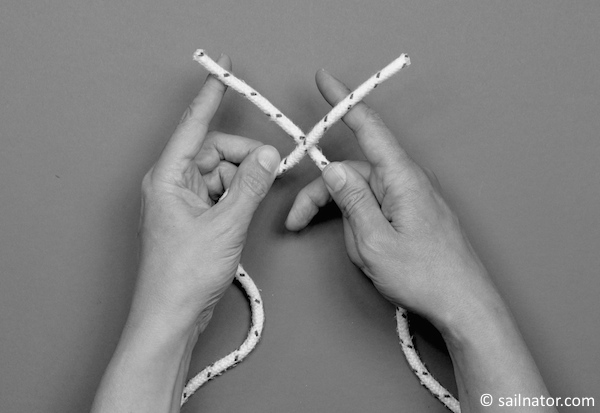
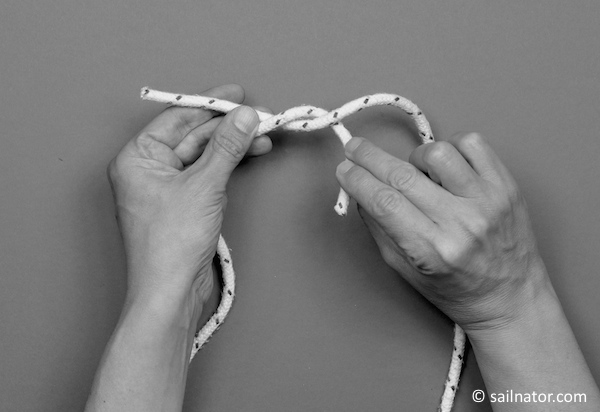
… and pull through one end underneath the other.
 The knot-lessons have also been published as ebook and paperback. For more information click here!
You can download the Ebook for example at:
iTunes UK & iTunes US | iBooks for iPad and Mac
Amazon.com & Amazon.co.uk | Kindle-Edition
Google Play | for Android
The paperback is available at: Amazon.com | Amazon.co.uk
For the next step it is now important which of the lines was lying on top of the other at the beginning. I just check it. The end of the line that I now hold in my right hand was lying above.
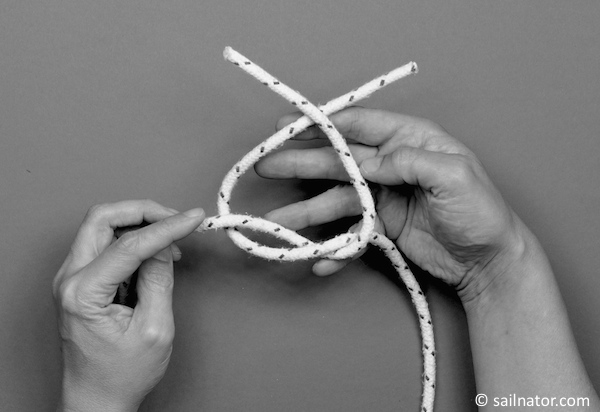
I take it, put it over the other line again, get it with my right thumb and wrap both lines around each other.
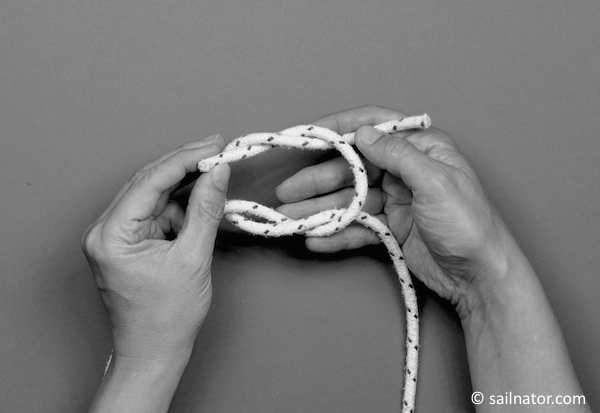
I now pull on all four parts of the lines at the same time und the square knot is finished.
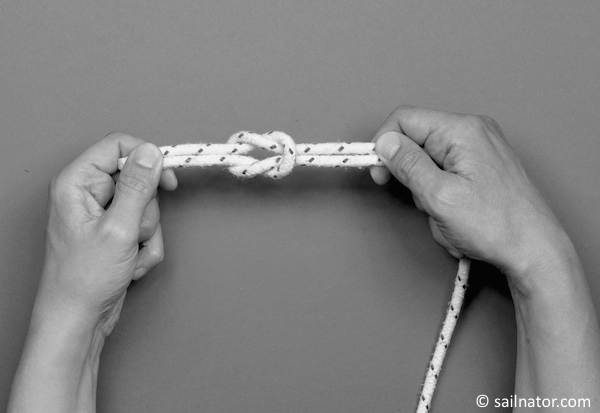
The knot is tied right when both ends of the lines are on the same side. If not it is not the square knot. It opens up easily. It is even important that the line that was lying above first lies on top the second time too. We can open the square knot by holding one of the connected lines and pull the end that is parallel to it. That even works if the knot was pulled together very tight over some time. Practice the square knot till you are able to tie it with closed eyes or behind your back.
All knots: Figure-eight knot | Square knot | Bowline knot | Cleat knot | Clove hitch | Clove hitch (laid) | Clove hitch (thrown) | Sheet bend | Double-sheet-bend | Round turn and two half hitches | Rolling hitch | Cleat with bowline knot